
These simple homemade donuts are the best make at home donuts I’ve ever had! Before this, I had only ever made donuts that were baked. You know, the ones made from a donut pan, kind of cakey, don’t-really-taste-or-smell-like-donuts, more so just baked in a donut pan… those ones. Don’t get me wrong, baked donuts can be good, but they’re more like cake based in a donut pan than a real, authentic donut made at home.
I recently watched a Try Guys video on donuts (love love love the Without A Recipe series) and the expert said something along the lines of the following. Donuts are fried… not baked… thats why we don’t call them a baked good, we call them pastries. And I couldn’t agree more.
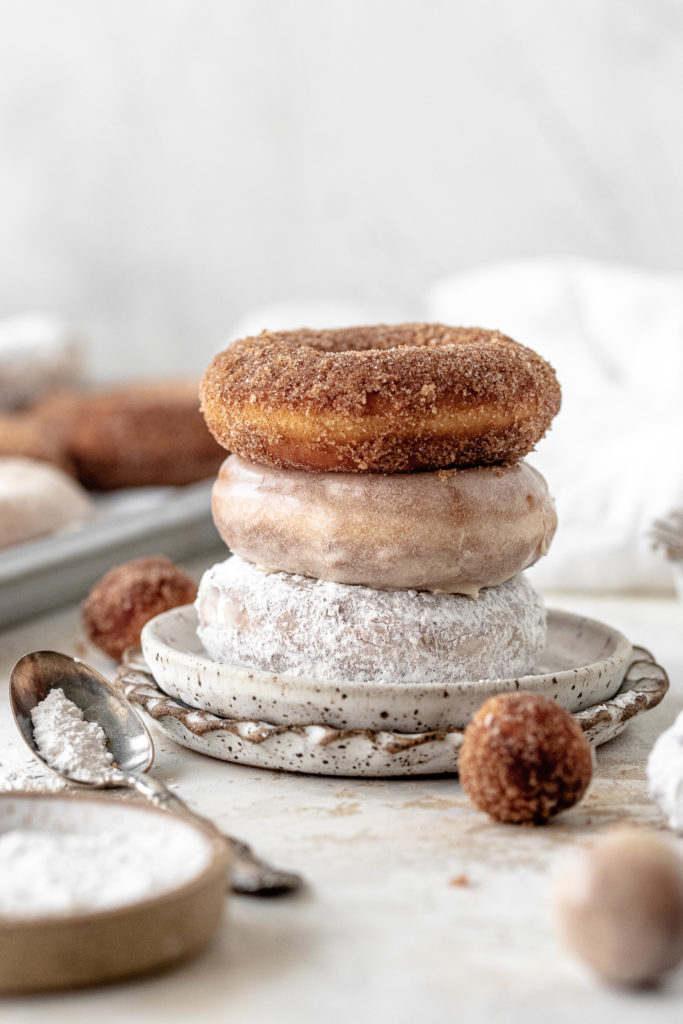
These simple homemade donuts are traditional in the fact that they are fried, they have a few classic topping choices, and they make your kitchen smell like you’ve just stepped into a bakery (in your own kitchen!).
Part One…. Yeast.
This recipe starts by blooming the yeast. This is simply a process of waking up the yeast and getting it prepped to go to work (aka to make the donuts rise!). We’ll mix the yeast with a combination of milk, water, and sugar which will then heat to 110 – 120 degrees Fahrenheit and let sit for about 10 minutes until it gets frothy and bubbly. At this point, it’s awake and ready to use!
Then, we combine the milk, water and yeast mixture with the remainder of the wet ingredients (eggs, butter, cane sugar and vanilla).
Kneading The Dough
To finish off the dough, the salt and flour is added to the mixture and then we knead it! Kneading is a super simple process, but fully necessary as it creates the strands of gluten that will help to hold the donuts together and create their structure. If you’ve never kneaded dough before, there is a very simple tutorial here from Bon Appetit! You’ll want to knead your dough until it is smooth and no longer sticks to your hands when kneading it. About 5 minutes is a good starting point, but continue kneading past 5 minutes if your dough is not smooth at that point. You can also add a couple tablespoons of all purpose flour during the kneading process which will help the dough stick less, and come together.
Letting it Rest… AKA Proofing.
If you watch The Great British Bakeoff as much as I do, you’re super familiar with proofing. If not…. let’s break it down. Proofing is one of the most important parts of recipes that rely on yeast as the leavening agent. The process of letting your dough rest in a dark, slightly warm place, also known as proofing, is essentially what makes these donuts light and fluffy. Proofing is essential as it gives the dough time to produce air bubbles prior to baking. The recipe for these donuts relies on two separate chunks of proofing. The first (before rolling out the dough but after kneading) being 1 hour and 45 minutes, and the second being 45 minutes (after cutting the doughnuts but before frying).
Frying Tips & Equipment….
I’ll be honest… up until about a month or two ago, I was absolutely terrified of frying anything. I thought the oil would bubble up and likely burn me. But boy oh boy was I wrong. I mean, sure, I’m incredibly clumsy and have gotten my fair share of accidental cooking injuries, but none from frying. My main tips for frying these donuts:
- Use a kitchen thermometer & heat your oil to 350 – 360 degrees Fahrenheit! No lower no higher.. any lower and your donuts won’t fry, any higher and your donuts will cook too quickly becoming far too brown. Temperature of the oil is of utmost importance when frying anything, especially donuts.
- Watch the donuts closely when they’re in the oil! You want to look for browning. 🙂 My general rule of thumb is 30 – 40 second per side, varying slightly based on the temperature of your oil and whether it is closer to 350 or 360. Once the first side starts to get slightly golden brown, flip the donuts over and repeat.
- The number of donuts you will be able to fry at a time will depend on the size of the cast iron, dutch oven, saucepan etc that you are using! I use a standard 12 inch cast iron skillet and I fry 3 donuts at a time.
Other Tips & Substitutions
- You can use whole milk, 2% milk or 1% milk in this recipe. I do not recommend using skim milk or any milk alternatives as the fat in the milk helps keep the donuts tender and flavorful.
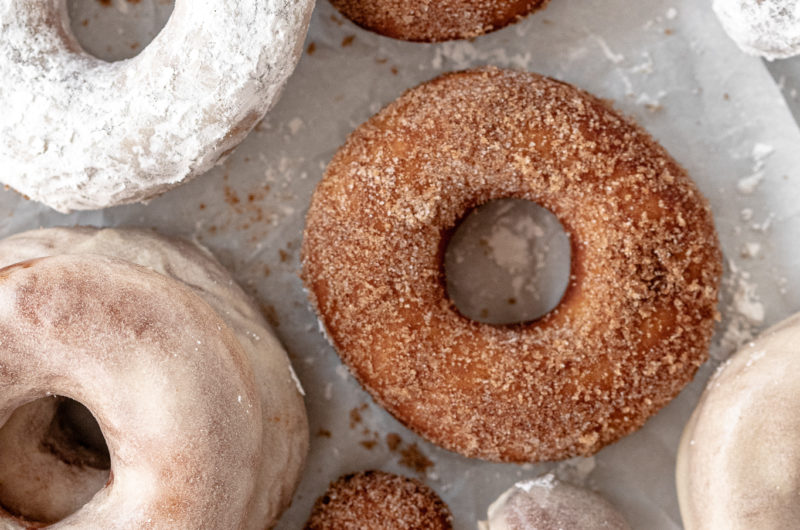
- You can use all three of the donut toppings as I did in this simple homemade donut recipe, or choose just one and run with it! If you do go with just one topping as opposed to all three, please double the measurements for your preferred topping. 🙂
- I used dry active yeast for these donuts and I recommend it as the leavening agent in this recipe. If you’d like, feel free to try instant dry yeast, but please keep in mind, I have not tested it with these donuts.
Basic Authentic Homemade Donuts
13
Donuts & 13 Holes20
minutes30
minutesIngredients
- Donut Dough
1/4 Cup Water
1/4 Cup Whole Milk
1 Packet Dry Active Yeast (equivalent to 2 & 1/4 tsp)
1/4 Cup Unsalted Butter, melted
1/2 Cup Cane Sugar
1 Whole Egg + 1 Yolk
1 Tbsp Vanilla Extract
2 & 1/2 Cup All Purpose Flour
1/2 tsp Kosher Salt
- Frying
32 fl oz Canola Oil or Vegetable Oil
- Cinnamon Sugar Topping
1/4 Cup Cane Sugar
1 Tbsp Cinnamon
- Glaze
1 Tbsp Unsalted Butter, melted
1 & 1/2 Tbsp Whole Milk
1 tsp Vanilla Extract
1 Cup Powdered Sugar
- Powdered Sugar Topping
1/2 Cup Powdered Sugar
Directions
- Begin by blooming the yeast. This is simply a process of waking up the yeast. Heat the milk, water, and 1 tsp of cane sugar in a small – medium mixing bowl to 110 – 120 degrees Fahrenheit. Then, immediately pour the yeast into the mixture. Let that sit for about 10 – 15 minutes until it gets frothy and bubbly. At this point, the yeast is awake and ready to use!
- Then, in a larger mixing bowl mix the mixture of milk, water and yeast mixture with the remainder of the wet ingredients – eggs, butter, remaining cane sugar and vanilla extract.
- Once the wet ingredients have been combined, add in all purpose flour and kosher salt. Then, mix with a spatula until a shaggy dough forms.
- Next, on a clean surface, sprinkle about 1 tablespoon of flour. Turn your shaggy dough onto the floured surface and knead for about 4 – 5 minutes, until the dough becomes smooth and is no longer sticky. Reference directions above on how to knead!
- Once the dough has been kneaded, lightly grease a large bowl with butter (this is essential to give room for the dough to rise) and place the dough into the bowl. Cover with a clean kitchen towel and place in a dark area for 1 hour and 45 minutes to proof. I prefer to proof in an oven that is turned off, with the oven light on. During this time, do not touch the dough, just let it rest & proof!
- Once the dough has rested for the allotted time above, it should have approximately doubled in size. At this point, turn it out again onto a clean, floured surface and roll the dough to about 1/2 inch thick.
- Cut out doughnuts with either a donut cutter or biscuit cutter – whatever you gave on hand! If using a biscuit cutter, cut out the inner donut holes with something small such as the wide end of a frosting decorating tip.
- Then, place all donuts and donut holes onto a large baking sheet and cover with a clean kitchen towel again for the second proof (rest) of 45 minutes. This is the last time they need to proof. 🙂
- When the donuts have about 10 minutes left to proof, add 32 fluid ounces of canola or vegetable oil into a cast iron skillet or dutch oven and heat to 350 degrees Fahrenheit. This temperature is very important!
- Once the donuts have finished proofing for the second time, and the oil is to 350 degrees, begin adding them into the oil, about 3-4 at a time depending on the size of the pan you are using to fry in.
- Your donuts should float immediately after dropping them into the oil. Fry each donut for about 30 – 40 second per side, varying slightly based on the temperature of your oil and whether it is closer to 350 or 360. Once the first side of starts to get golden brown, flip each donut over and repeat the cooking for 30 – 40 seconds. Once done frying, remove each donut from the oil and let it cool on a wire cooling rack. Repeat until all donuts have been fried.
- Making the Donut Toppings
- If you are glazing your donuts, you’ll need to wait about 10 minutes for your donuts to cool before glazing them. You don’t want to glaze them while they are still hot or it will just melt right off. Additionally, if you want to glaze all of the donuts as opposed to making a variety of toppings, please double the measurements for the glaze. 🙂
- To make the glaze, simply add melted butter, milk, vanilla and powdered sugar to a bowl and mix until it comes together! Add an additional teaspoon of milk if needed to thin out the glaze to your preference.
- Then, dip each donut into the glaze and place back onto the wire rack to dry.
Leave a Reply